Quick Start Guide
- Create an account
- Create sample widget
- Publish widget
Create an Account
If you have Google Account, just visit https://app.getwidget.net, click button "Signup with Google" and an account will be created for you automatically.
You will be navigated to page displaying your account information like this one:
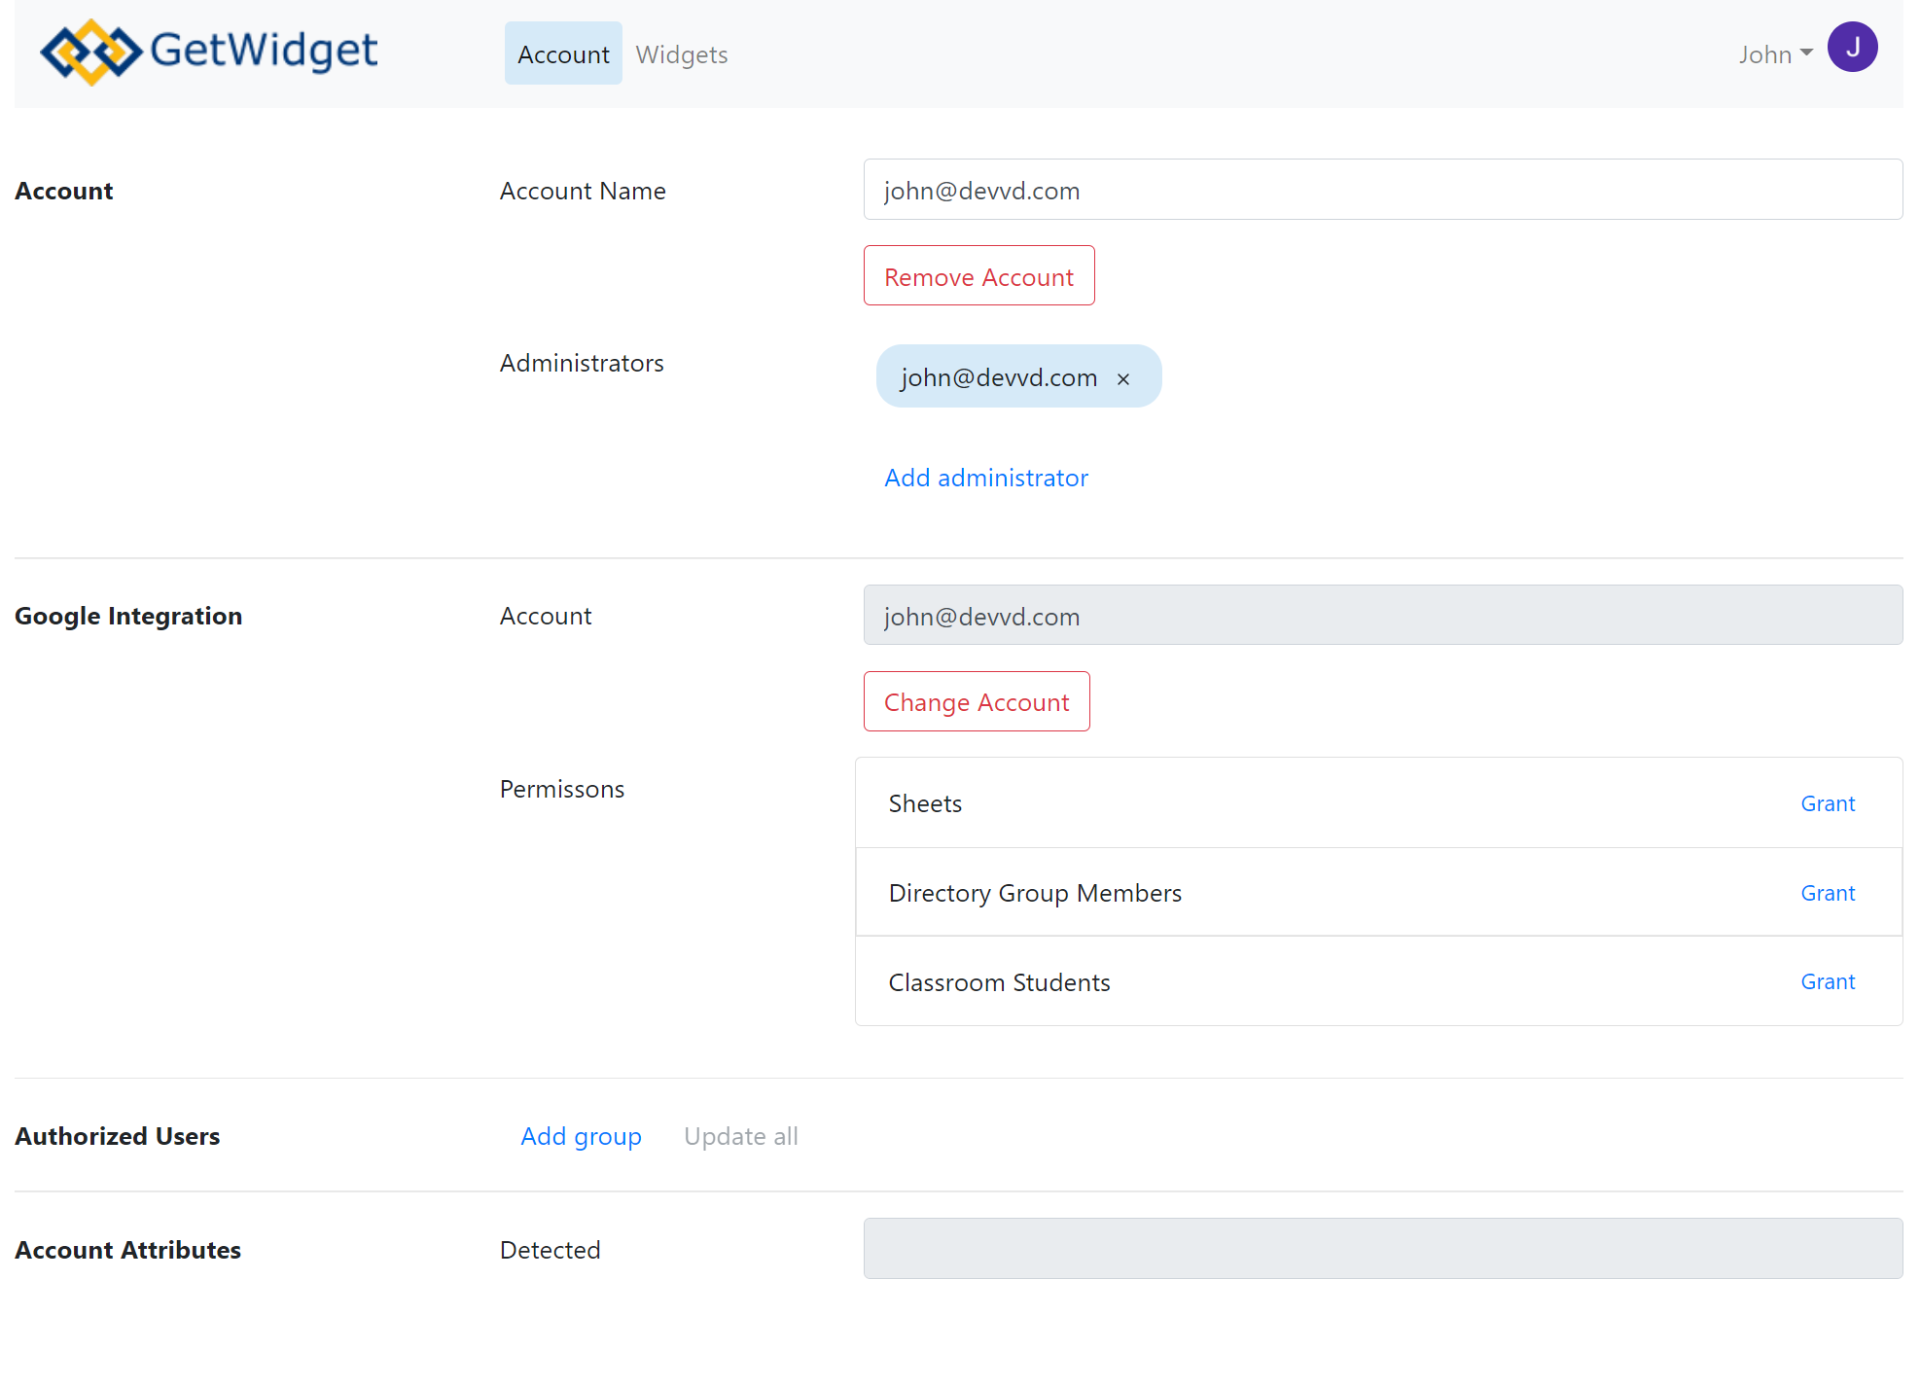
Unless you want to use publicly shared Google Sheets you must
allow GetWidget to access your data. This is done in Google Integration section
of your account page.

Click on "Grant" button next to "Sheets". This will open popup
with Google notifying you are about to grant permissions. Once you click "Allow"
GetWidget will get permission to read your sheets. You can remove this
permission anytime on Google Account page https://myaccount.google.com/permissions.
Create Sample Widget
Each widget requires underlying source of data it will display. For now data is loaded from Google Sheets.
Navigate to Google Sheets https://docs.google.com/spreadsheets, create blank spreadsheet and enter some sample data.
For the purpose of this quick-start guide it is important for this new spreadsheet to be created under the same Google account as the one you used for creating GetWidget account.
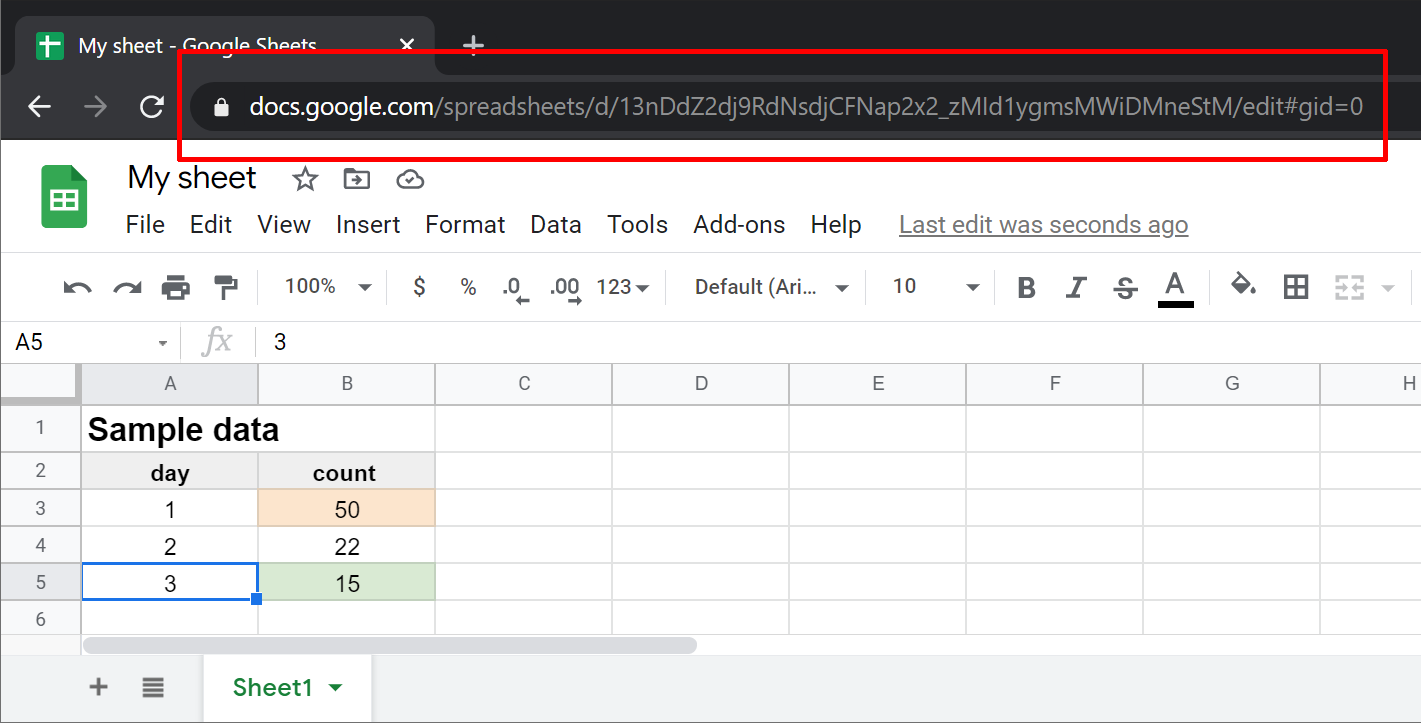
Please, note spreadsheet address, also called URL, in your browser's address field. You will need this address while creating data source for a widget. No need to do anything with the address now, just keep in mind it does exist.
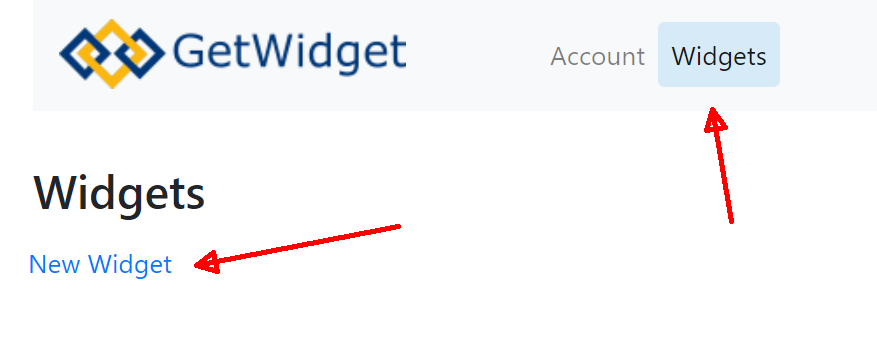
No go back to you GetWidget account and click "Widgets" in the top navigation menu. Create new widget by clicking "New Widget" button.
Enter widget name and from "Type" dropdown box select "GSheet
Table".
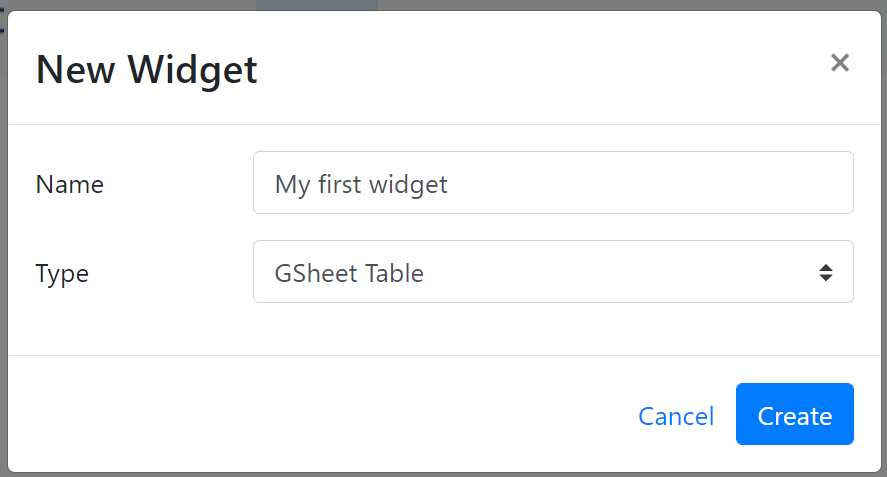
Click "Create" to create and edit widget properties.
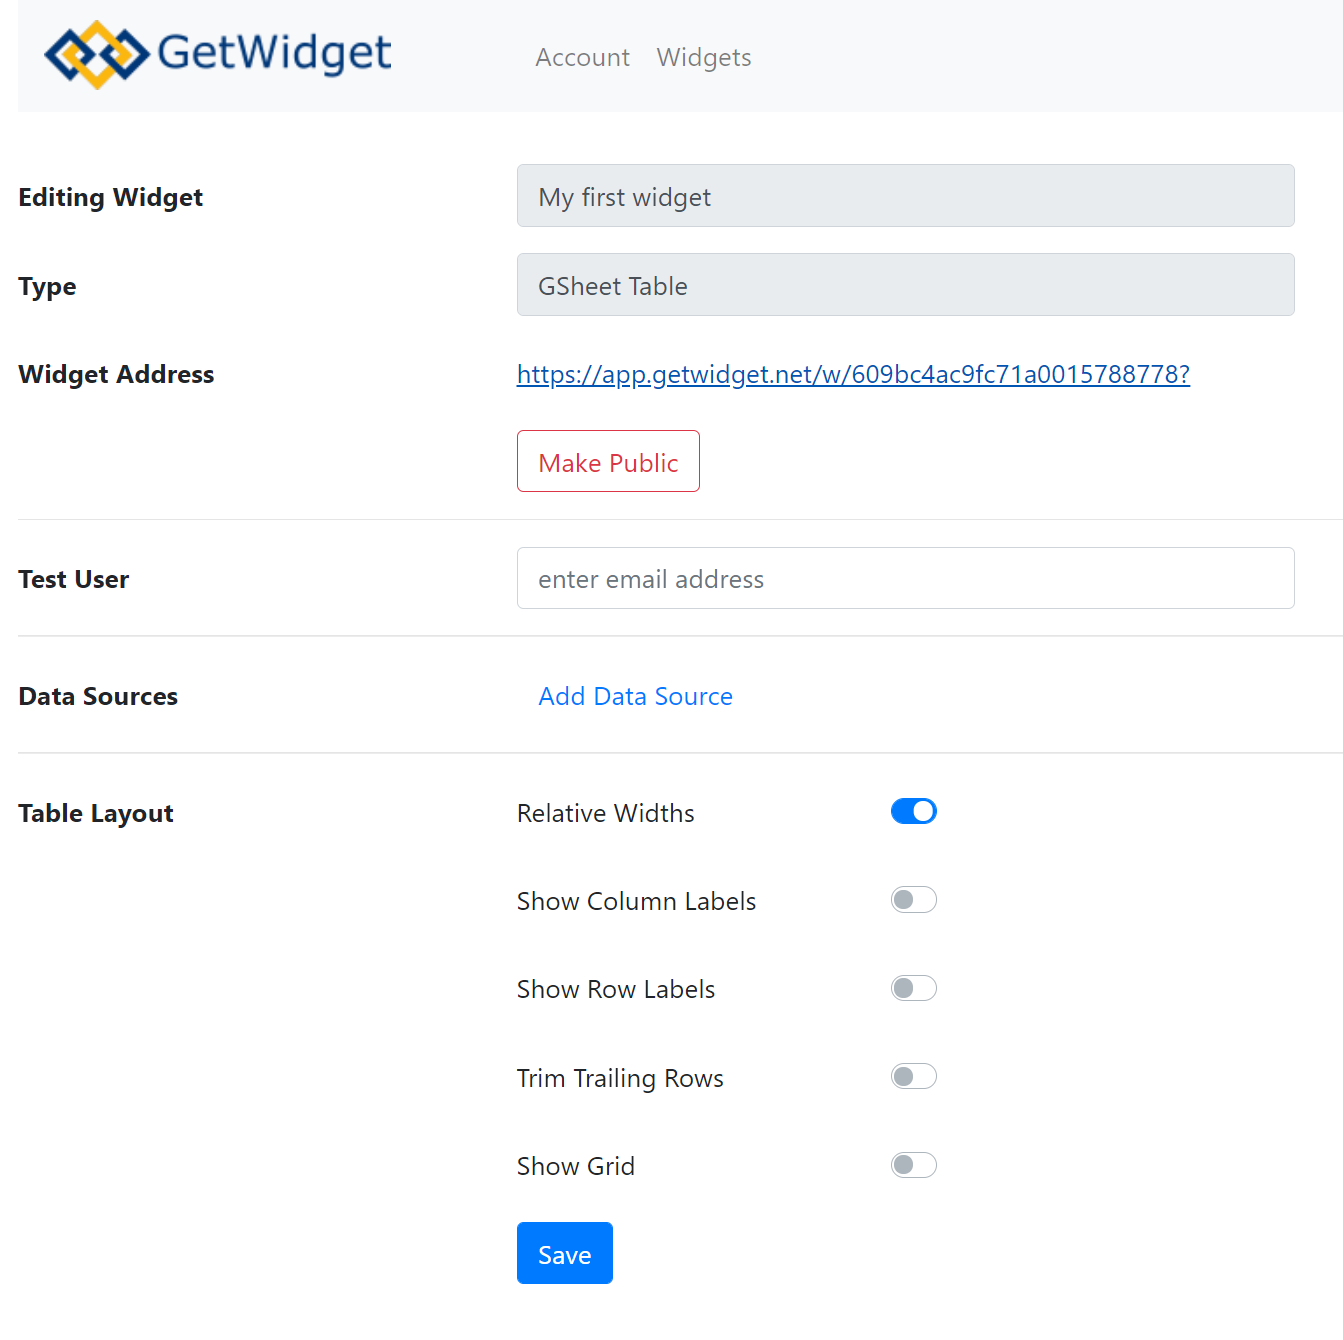
In this moment widget does exist and knows it is a table,
but to see come content you need to supply data. Data will be loaded from data
sources specified on the widget.
Click "Add Data Source" to add spreadsheet created earlier as a data source. In this moment you will need to enter spreadsheet address/url and spreadsheet range.
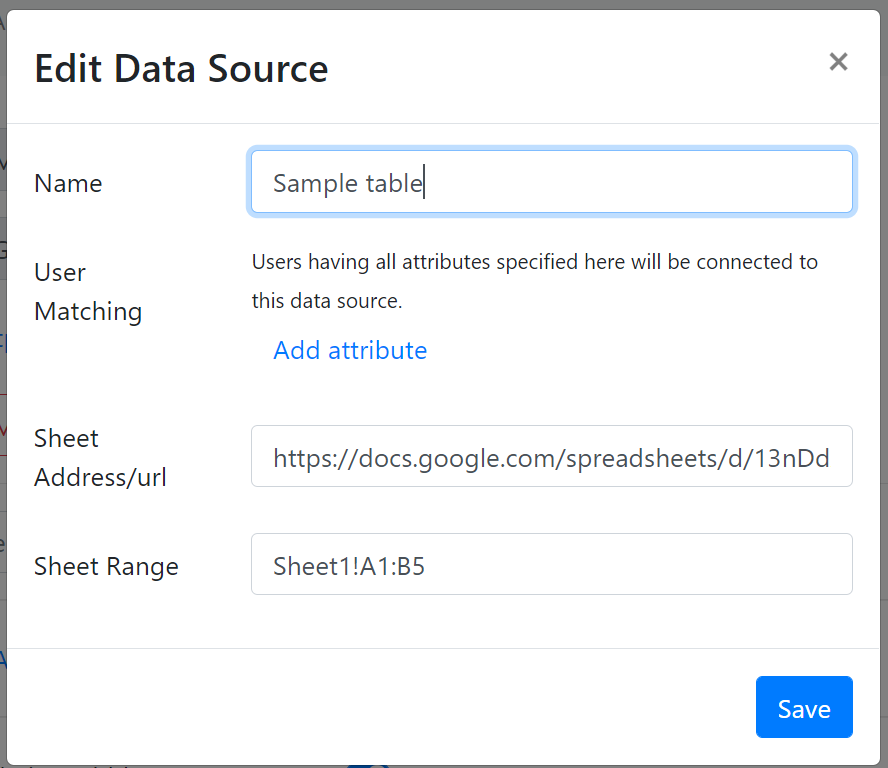
As name you can any text e.g. "Sample table".
Just copy spreadsheet address from your browser's address field and paste it there.
As for sheet range - if you are familiar with Microsoft Excel or Google Sheets, then you know range defines set of spreadsheet cells. GetWidget require range to include also sheet name in format {sheet_name}!{top_left_cell}:{bottom_right_cell} e.g., Sheet1!A1:D5. If sheet name contains spaces, then it has to be enclosed in aphostrophes e.g. 'My Sheet'!A1:D5.
Click "Save" and you are done.
Publish Widget
The last step is to publish newly created widget.
As we skipped account configuration, we also skipped adding authorized users to your account (see Account section), so now nobody except you can access this widget.
For now, make it public by clicking button "Make Public".
Please, note that widget address changed after making it public.
To test your first widget simply click on widget address. Clicking will open new browser tab showing your widget. You can experiment with widget properties a bit enabling and disabling labels, grid etc. You can also change contents of the spreadsheet. Just remember to click reload button in the browser tab showing your widget to see the changes.
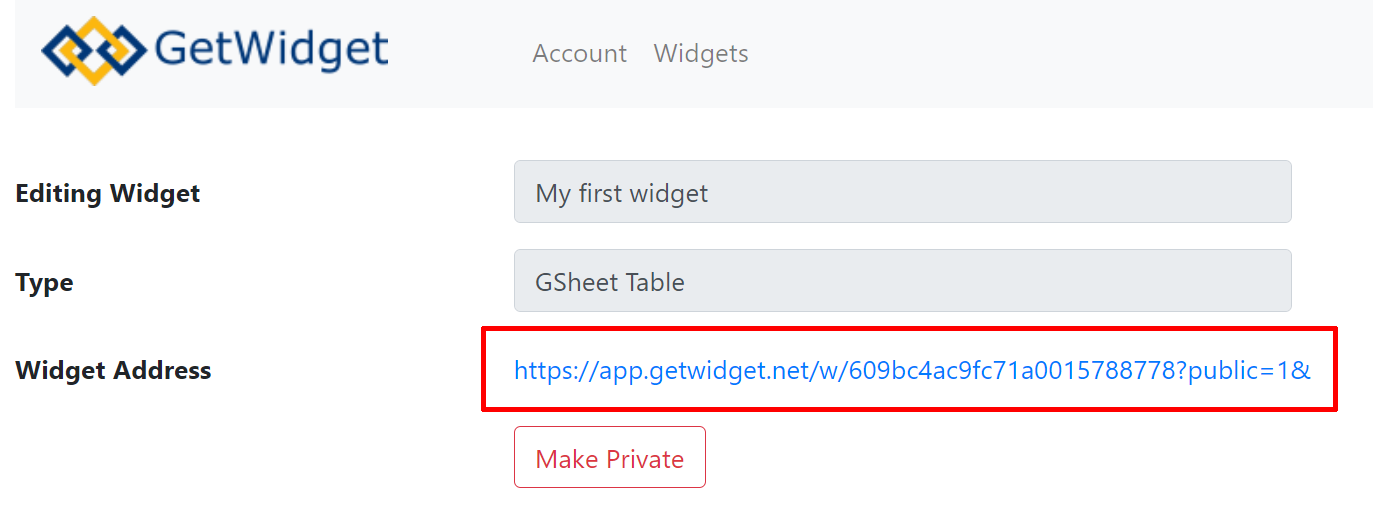
At last, you can copy the widget address and e.g. send it via email to your colleagues. Or you can embed it to a Google Site (see "Add content from another website" )
